
 Today, I took a break from my living room to make a pair of jeans for David. This is not the first time I have done this. I had this pair of jeans that I absolutely loved before I got pregnant. About the time I could no longer wear them, they got a hole in them. I really loved those jeans and I really didn't want to throw them away; Therefore, I didn't. I got the idea to make baby jeans out of them. I had been making some things for the baby already and just added this to the list.
There were a lot of great things about this idea, but the best is that you don't need a special sewing machine to make the special seams, you just use the already existing hem and seam. There are problems with this, but baby clothes are so often stained and are almost always grown out of in a few months, so I figure shortcuts are great.
I made the original pair with a pattern and just hopped they would fit; I didn't have a baby yet after all. I have since decided that basic things like pants actually fit better if I make them by using a pair of pants that I know fit David as a pattern, so that is what I did today. Today's jeans were much less loved that the first pair, in fact they were purchased as work jeans from a thrift store and then got a hole in the knee. (I can't stand wearing jeans with holes in the knees).On a whim, I also decided to make pockets in the back. I only do this using my jeans because girls' jeans have a bit more stretch to them than boys' do. It would probably work either way.
To make this, you need a pair of old jeans (I don't know that skinny jeans would work), a pair of pants that fit the baby, whatever thread color you want to used (I use tan, like the stuff they were originally sewn with but not as thick), and enough elastic to fit around the babies' waist (I actually used some of the elastic from my fitted sheet I used for the curtains here).
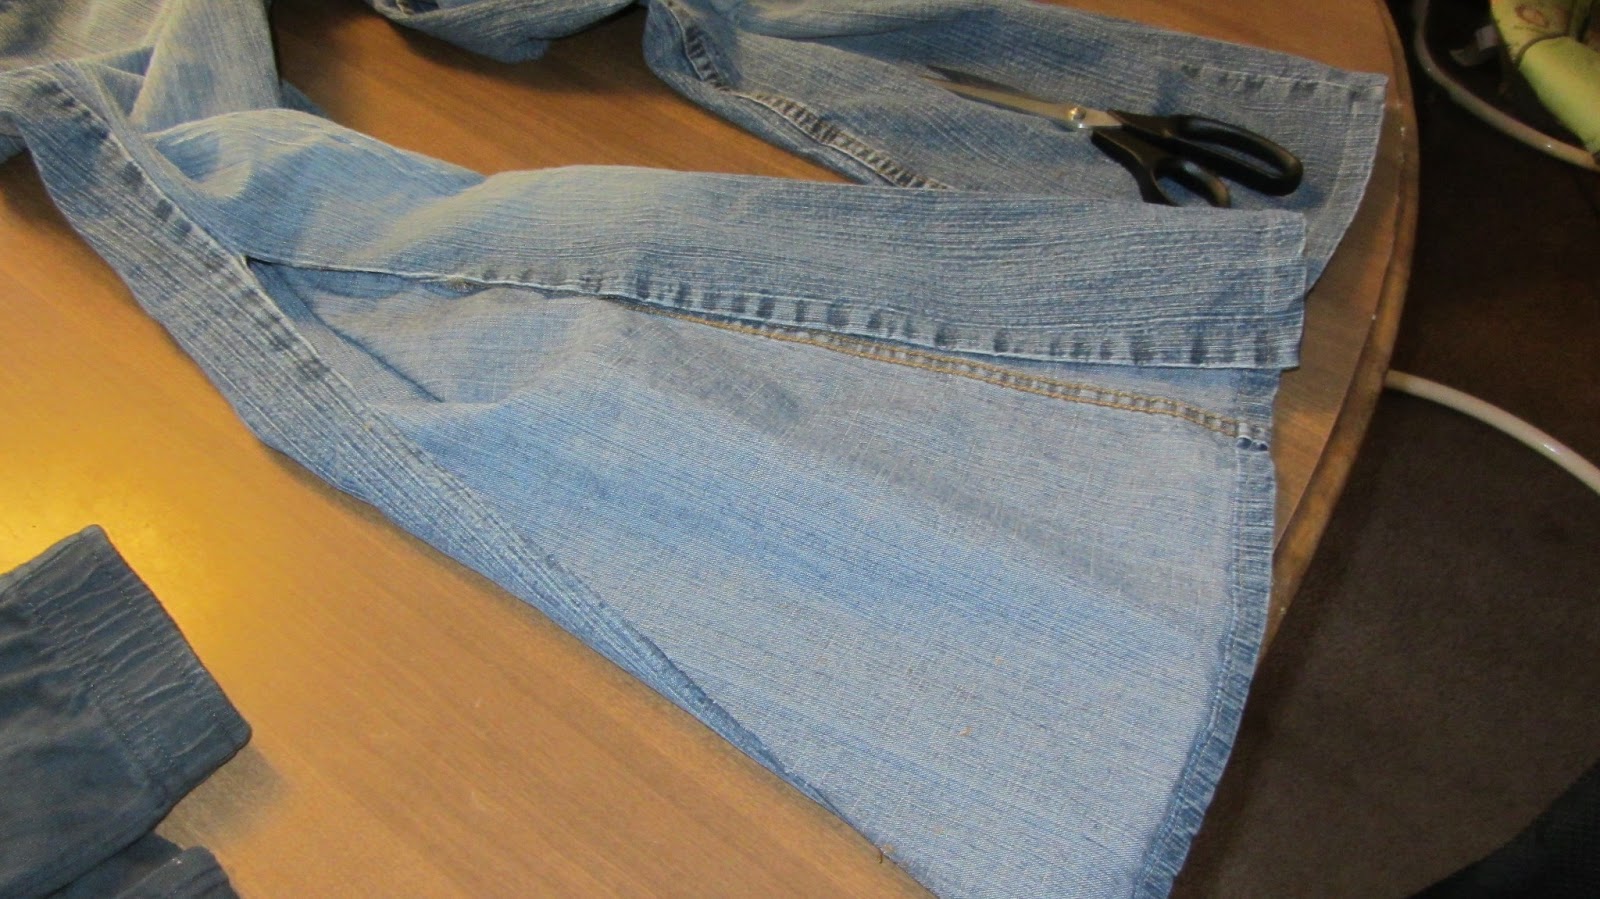 The first step is to cut along one seam on the leg. The first time I cut along the side with the thick seam (inside) because I thought it would work better for a baby. This time I cut along the other side because I wanted to use the thick seam. The seam you keep does end up on the outside of the leg. In other words, the jeans I made today are backwards from the original jeans, seam-wise, but I decided I didn't care. I leave the decision up to you.
 Once you have made this great moral decision and cut, fold your pattern pants in half and lay the outside seam along the seam you kept. You can pin it in place if you wish. Cut around the pattern with a seam allowance. Because the jeans are less stretchy than the pants I used, I actually cut around about an inch from the edge of the pattern, even though I only had quarter inch seams. Bear in mind in this step that the front and back of pants are not exactly the same. I cut out the front (smaller) side first. Leave an extra inch and a half or so at the top to make a waist band. Then, lay your pattern pants on the other side of the seam and repeat the process, cutting around back of the pants this time.
  If you are not comfortable with this, you could trace your pants on paper and add the seam allowance to the drawing. I was too lazy to do this for only one pair of pants.
In the end, you should have something like the picture to the left, a rectangle that curves out to points on either side. Next, cut the other leg to make it flat and pin your first piece to the newly opened leg with right sides together with the seams matching. Cut around the edge of your first piece.
 At this point, you just begin sewing basic pants. This process has been explained enough times in enough patterns that I shan't bore you with the details. If someone wants me to explain, let me know.
 Once I finished the pants, I decided to add pockets. I just cut out pocket shapes from the bottom of the jeans (recycling the hem once again), and then folded over the three edges without the hem and ironed them. I pined them in place and top stitched around the edges. In the picture, the right pocket is finished and the left still needs to be stitched.
  I think David manages to make up for any imperfections in the pants.
No comments:
Post a Comment
Thanks for the comment! If you wish to contact me directly, you can email me at bethslemonade@gmail.com.