Saturday, March 30, 2013

Making a Swaddler


David actually has very few clothes of his own.  My sister Carol has lent me all of her son's baby clothes.  Since Henry is about a year older, this has worked out well. Among the box of clothes Carol lent me was a swaddler, a blanket designed specifically to swaddle babies with Velcro to keep it tight.

This has been wonderful for David. He won't sleep unless he feels pretty cozy and since he can now unswaddle himself, other blankets become loose and present a hazard. Though David can still get his arms out of the swaddler and as of late kick his feet out the bottom, the Velcro keeps the blanket wrapped around his abdomen securely.

Unfortunately, as can be seen in the picture, David is now much too big for this swaddler. He has been too big for a while, but I finally admitted it sometime recently. As I have already fought and surrendered (after about a week of him sleeping no more than 45 minutes to an hour at a time) the battle to have him sleep unswaddled, I decided to make him a new one.

My mother had sent me this bear flannel a while ago and I hadn't had a project for it yet. Though the original was made out of fleece, which is a good deal stretchier, I decided to use this flannel for the swaddler. As we are moving into warmer months, this will help David stay cool and I have swaddled him in flannel receiving blankets on numerous occasions, so I figured this would work as well.

I laid the original swaddler on the fabric and put David on top of that to mark how much taller it needed to be. I didn't actually make it much wider because the problem was length, but I did leave a little room for growth lengthwise. I just cut around the outside to make it just a little larger than I wanted it to be.

The original had darts on the shoulders and by the feet, so I wrapped David in the fabric and made similar darts, like in the picture above. I then cut out another peace of fabric to make the inner pocket he sits in. I folded over the open edge (the edge of the pocket on the top and left side of the picture to the left) twice and hemmed it before sewing up the edge on the bottom to the larger piece.

I then basted the bottom of the pocket to the edge of the larger piece.  I finally folded the entire outside edge over twice and hemmed. I made the darts go toward the outside, like in the picture, and just folded them into the hem as I went.

I then let the project sit for a week (optional step).  Finally yesterday, I got out the fusible Velcro, cut off two small sections, wrapped David in the swaddler, marked where I wanted the Velcro to go and put it on.  It probably took 10 minutes at most. I skipped sewing tabs like the original swaddler as I decided they were unnecessary.

I think he is pretty cute in it, but then I think he always is.

Friday, March 29, 2013

Wall hanging for free

I obtained the picture frame at the left from work. The glass had broken and someone was throwing it out.  I decided that it was still perfectly good for something.  Though I didn't have specific plans, I have a bad habit of collecting things that I think might have potential for something eventually (which is about anything I come across). Then years passed. I moved the frame with us, but it still remained exactly like it is on the left--until last night.

I had been toying with the idea of making it into a piece of art for my living room.  I considered putting some fabric over the frame but I decided against it because I wanted to make a branch.  Unfortunately, for the branch idea, the space I wanted to put it in required it to be vertical, so I decided to do a tall skinny tree with yellow leaves.

I used the same grey paint I used to paint the vase as well as the same white I used to paint the table, both of which were left over from Patrick's work.  The yellow is just some acrylic from an art set I got for Christmas when I was still in High school. I mixed it to match the yellow in my leaf fabric. That made the grand total cost to me $0.

The backing to the frame is some kind of fiberboard. I just painted it with a few grey coats.  I then free-handed the tree with the white paint. I considered drawing it with pencil first, but I know from some previous not so great experiences that I am actually much better at painting than drawing. I then went over the whole thing with the white again to keep the grey from showing through.  I then added the yellow leaves with two coats.  I finally added the white bird.  I went through with some more grey at this point and made a few touch ups, notably thinning down a branch that was too fat for where it was on the tree. I think I like it.

Friday, March 15, 2013

House Plant Dress-up

I used to work as a Custodian in the girls' dorms on campus. The last summer I worked there, we adopted a plant that was abandoned at the end of the summer by one of the residents.  We named it Harold. It was a rather resilient thing as we often forgot to water it for a while and it did just fine.

At the end of the summer, the place where we were keeping the plant had to be unlocked so we just decided to take it home. One of my coworkers took the main part of the plant and I took the random off-shoot it had begun growing from its roots.

Once home, we planted it in a very large, red plastic bowl. The plant looked lonely and forlorn in the oversize container and so I decided that, with the rest of the living-room makeovers, it deserved something new.  I went to the dollar store recently to see if I could find a new container.  I couldn't find exactly what I was looking for, but I did find this vase.  It was clear glass. I do have to be careful to not over water the plant since it doesn't have a hole in the bottom to drain. Patrick also happened to have a whole can full of grey house paint.

While the paint will wear/ scratch off eventually with rough handling, I figured it would work fine for a house plant.  I just painted the outside of the vase.  I decided to do one coat and leave some evidence of brush strokes because I thought it gave it character (and David woke up from his nap). I then tied a yellow ribbon I had around it and had a stylish new house plant.

I do have to be careful to not over water the plant since it doesn't have a hole in the bottom to drain.

Tuesday, March 12, 2013

Building a Bed

I live in a relatively small apartment in a basement. I am not complaining and I actually like my apartment a fair bit.  However, space is sometimes a concern. Still, it is not as much of a concern here as our first apartment.

Our first apartment was in a house that was built sometime in the 1890s. It was one level and that level was divided into 4 apartments.  Our apartment was roughly 365 sq feet and heated by a gas heater in the corner of the bedroom. The heater did a fantastic job of heating the top quarter of the apartment (we had very tall ceilings). We had single pane windows and a poor seal on the door.  I found myself baking a lot to keep the apartment warm.

Sometime in January, I decided I just couldn't take it anymore.  We had no space and I was always cold. So, we came up with a great solution: a loft bed. Since we didn't have a ton of money to spend and queen size loft beds are not exactly really easy to come by, we arrived at the decision to build one. We attempted to design one, but I was not very sure of what we were doing, and as neither Patrick nor I had ever built furniture before, I was uncomfortable with our first piece being something that put us 6 feet in the air while we were sleeping. Thus, I found a website that sold plans here and we purchased them for $10.

The only thing we really did differently was that we built it using cheaper lumber, which meant more sanding, and we didn't screw in the slats, which made it easier to take apart. We built the thing over the Saturday and Monday of Martin Luther King weekend. We used leftover plywood to build a desk for me and some shelves (Patrick already had a desk, which we placed under the loft bed as well. A while later, we decided to stain it.  Because the room the loft bed was in was so small, it is a bit difficult to see what is a picture of it.  This a picture of my desk and the shelves.  We used Christmas lights for extra light, which can be seen on the ceiling.

When I was 6 months pregnant (and having a rather rough time getting up the ladder) we moved to our current apartment and left the loft bed behind for Patrick's sister to use (she and her husband moved in when we moved out). Our bed was back just on a box spring.

Figure 1
In October, I had a baby shower and got 600 diapers (which we just finished using a week ago. Diapers are a wonderful gift). I decided we needed more storage again. Since the ceilings were shorter (and I was still pregnant), a loft bed was no longer a good option.  We also had a box spring, which we had just tipped up against the wall with the loft bed (and I had used it as a bulletin board), that I decided to incorporate into the new bed.  Because Patrick was in school and I was not, I designed this one by myself. The height was decided based on the height of a box of diapers, but you could really make it any height (within reason) by just adding or subtracting the same amount from all the 4 x 4 pieces needed (Table 1). My original plans are in Figure 1 as seen from the side of the bed.
Table 1

I figured out everything for the bed would cost me roughly $30. I got help from a friend, Celeste, to go get the boards and that Saturday, we built it.

I must note at this point that I actually purchased about 7 feet of extra 2 x 4. This was because Patrick told me that my design would not be stable and would need a lot of extra cross braces.  Suffice to say, I was right and he was less right.  We built it almost exactly like the picture.

Something that will help with understanding the instructions for building anything with 2 x 4s is that a 2 x 4 (and a 2 x 2, 4 x 4, and any other board measured like this) is not actually 2" by 4".  It was 2" x 4" and then approximately 1/4" is cut off of each side as it is processed, so a 2 x 4 is actually 1 1/2" x 3 1/2" and so on.


Figure 2
After cutting everything to length and doing plenty of sanding, we glued and screwed  (with screws every 6" or so) each of the 53" 2 x 2  onto a 5' 2 x 4.  This was the one thing we did differently than the original plan.  Patrick wanted to make it more stable by putting the 2 x 2 up from the bottom of the 2 x 4 three quarters of an inch, thus allowing more space to screw the 2 x 4 into the legs. The picture (Figure 2) shows it lined up along the bottom. I don't know if it would have worked that way or not. In any case, if you don't line it up with the bottom, you need to make sure you measure it level and the same on all the pieces you attach 2 x 2s to. The 2 x 2 should be centered lengthwise. A 4 x 4 should fit on either side of the 2 x 2 without hanging off the edge, but there should also not be a gap between the two. In other words  there should be roughly 3 1/2"  between the edge of the 2 x 2 to the edge of the 2 x 4.  We cut the 2 x 2s a bit long and then trimmed the extra to get a tight fit.

 Next, the 4 shorter 2 x 2s were glued and screwed to the 83" 2 x 4s (Figure 3). Each was placed far enough from the edge to allow a 4 x 4 and a 2 x 4 (the short way) to sit tightly next to it and not hang off the edge (roughly 5" from the edge of the 2 x 2 to the edge of the 2 x 4). There was a space in between the 2 x 2s  big enough for a 2 x 4 to sit the longer way (roughly 3 1/2").
Figure 3
Figure 4


 Once this was done, we screwed the longer four 4 x 4s into the spaces we left at the end of each 5' 2 x 4 (Figure 4). The top of the 4 x 4 is even with the top of the 2 x 2 so that the box spring can sit on it evenly.
Figure 5


We used 3 screws (Figure 5) on this side in an L shape in order to allow us to screw in the other side with another 3 screws without the screws potentially hitting one another.

Figure 6

We then screwed the 83" 2 x 4s into the 4 x 4 with 3 more screws and the end of the 2 x 4s with 2 screws to make a rectangular frame (Figure 6).

The remaining 5' 2 x 4 was put across the middle in the space left between 2 x 2s and screwed in with 2 screws.  The shorter leg was then centered on this 5' 2 x 4 and screwed in from the top of the 2 x 4 with 4 screws to make it like Figure 1.

So far, the bed is very sturdy and it has been several months.  It would be very easy to change the measurements on this bed to fit different mattresses.  If you did a twin, you probably wouldn't need the center beam at all.

Monday, March 11, 2013

David's Shirt and Tie

Yesterday, David went to church in a shirt and tie.  I made both, though the tie was a lot less work than the shirt.  The shirt was actually made out of one of Patrick's old shirts.  I used a pattern I got here from a lady named Jessica.  I adjusted it slightly since I was making it from a shirt I already had and, as we have fully established, I am a bit lazy.  I would also note that, when you print this pattern out, it is on several sheets and you have to tape the pieces together.

Fortunately, "Lazy" is Mother Necessity's husband (sorry boys, you get to be "lazy" because the woman in the relationship was already named. This is not a comment on my husband, he is probably a lot less lazy than I am).  Therefore, I just put the piece of the pattern that makes the side over the already finished edge where the buttons are.  There is a handy x that ends up marking where the start of the place where the buttons will be on the pattern, so I just lined that up with my already existing edge when I cut. I cut both sides out from the side with the buttons on it so I could make my own button holes where I wanted them to be.  You just have to make sure to cut one side out with the pattern flipped over. I used the buttons from the shirt.

I also cut out longer sleeves.  I cut them from an edge of the shirt, so they were already hemmed. I roll them up to make it look like there is a cuff. The last change I made is I made the pleat in the back go the opposite way from the plea Jessica made. That is the way Patrick's dress shirts are made. You can do that by just making what she made backwards.

The tie is just a ribbon.  This ribbon is 1 3/8 inches thick and about 32 inches long from tip to tip. You can adjust as you think is best. Both ends are cut into a point, like a tie. We just tied a tie (here is a youtube video of that, it you need it) with the ribbon.  To keep David from choking himself if he pulled on it, we pinned it with a safety pin through both sides ends and part of the knot. This made it much like the collar. I suppose you could also hot glue inside the knot and cut off the loop part, keeping it always tied.  Then, you can glue it to a hair clip or paper clip.

Another note: This ended up getting very drooled on. I used some ribbed ribbon because it was what I had on hand, but it was probably better than the satin ribbon because it  wasn't water-spotted. If your baby doesn't drool, it might not matter.  However, if that is the case, please tell me what you do to get your baby's saliva to stay in his mouth.

Saturday, March 9, 2013

Baby Jeans from My Old Jeans

 Today, I took a break from my living room to make a pair of jeans for David. This is not the first time I have done this.  I had this pair of jeans that I absolutely loved before I got pregnant.  About the time I could no longer wear them, they got a hole in them.  I really loved those jeans and I really didn't want to throw them away; Therefore, I didn't.  I got the idea to make baby jeans out of them. I had been making some things for the baby already and just added this to the list.

There were a lot of great things about this idea, but the best is that you don't need a special sewing machine to make the special seams, you just use the already existing hem and seam.  There are problems with this, but baby clothes are so often stained and are almost always grown out of in a few months, so I figure shortcuts are great.

I made the original pair with a pattern and just hopped they would fit; I didn't have a baby yet after all.  I have since decided that basic things like  pants actually fit better if I make them by using a pair of pants that I know fit David as a pattern, so that is what I did today. Today's jeans were much less loved that the first pair, in fact they were purchased as work jeans from a thrift store and then got a hole in the knee. (I can't stand wearing jeans with holes in the knees).On a whim, I also decided to make pockets in the back. I only do this using my jeans because girls' jeans have a bit more stretch to them than boys' do.  It would probably work either way.

To make this, you need a pair of old jeans (I don't know that skinny jeans would work), a pair of pants that fit the baby, whatever thread color you want to used (I use tan, like the stuff they were originally sewn with but not as thick), and enough elastic to fit around the babies' waist (I actually used some of the elastic from my fitted sheet I used for the curtains here).

The first step is to cut along one seam on the leg.  The first time I cut along the side with the thick seam (inside) because I thought it would work better for a baby.  This time I cut along the other side because I wanted to use the thick seam.  The seam you keep does end up on the outside of the leg.  In other words, the jeans I made today are backwards from the original jeans, seam-wise, but I decided I didn't care. I leave the decision up to you.

Once you have made this great moral decision and cut, fold your pattern pants in half and lay the outside seam along the seam you kept.  You can pin it in place if you wish. Cut around the pattern with a seam allowance.  Because the jeans are less stretchy than the pants I used, I actually cut around about an inch from the edge of the pattern, even though I only had quarter inch seams.  Bear in mind in this step that the front and back of pants are not exactly the same. I cut out the front (smaller) side first. Leave an extra inch and a half or so at the top to make a waist band. Then, lay your pattern pants on the other side of the seam and repeat the process, cutting around back of the pants this time.

If you are not comfortable with this, you could trace your pants on paper and add the seam allowance to the drawing.  I was too lazy to do this for only one pair of pants.

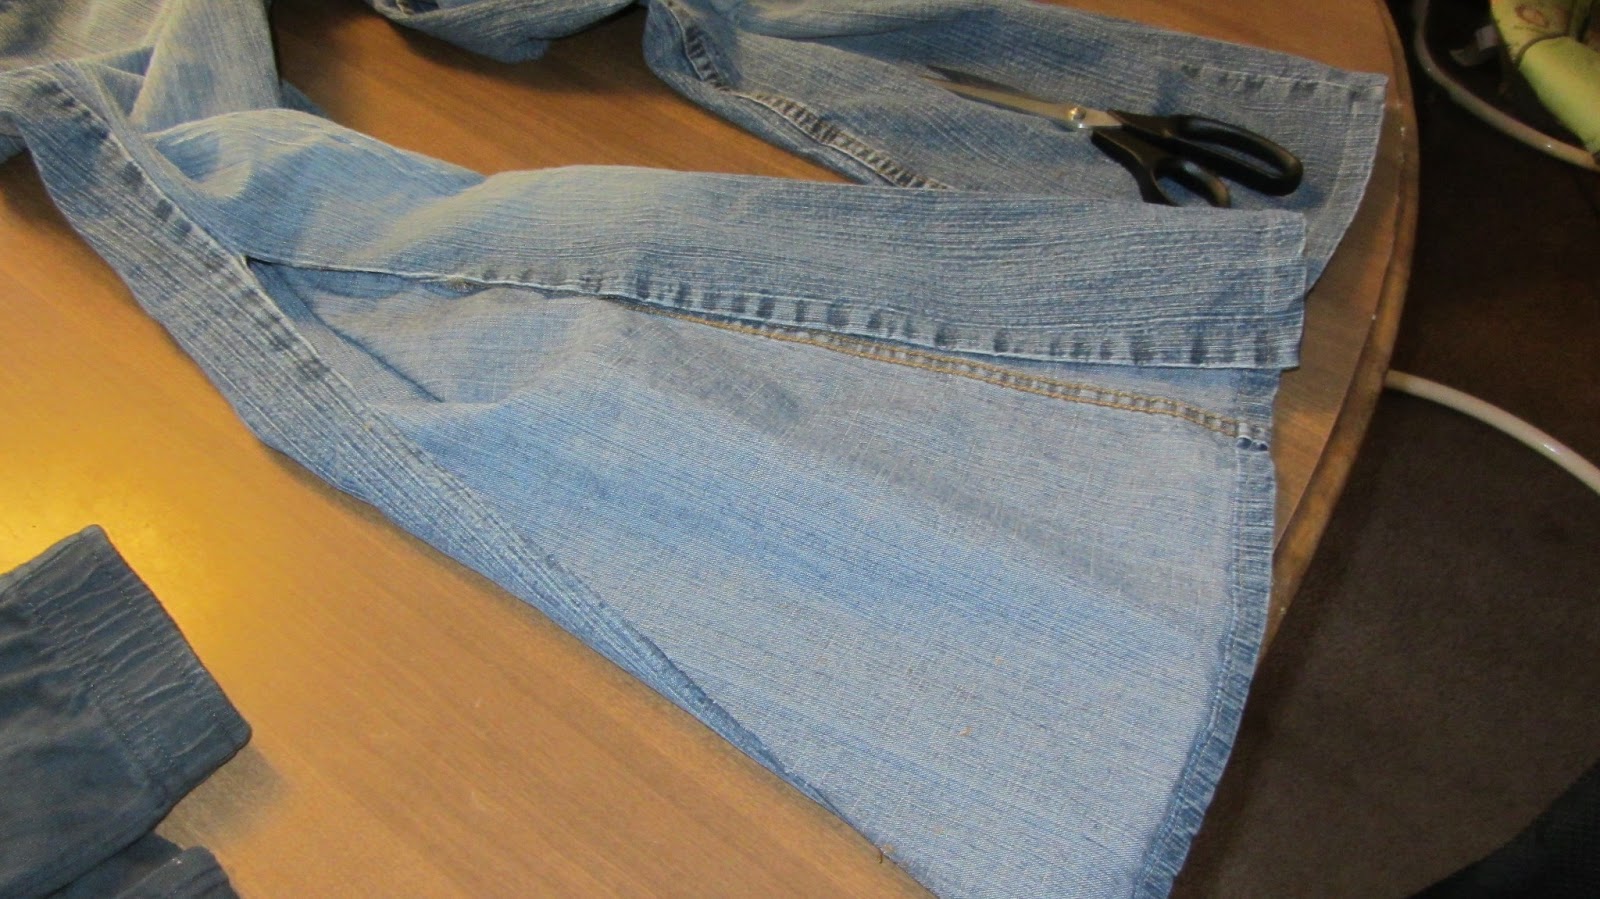
In the end, you should have something like the picture to the left, a rectangle that curves out to points on either side. Next, cut the other leg to make it flat and pin your first piece to the newly opened leg with right sides together with the seams matching.  Cut around the edge of your first piece.

At this point, you just begin sewing basic pants. This process has been explained enough times in enough patterns that I shan't bore you with the details. If someone wants me to explain, let me know.

Once I finished the pants, I decided to add pockets.  I just cut out pocket shapes from the bottom of the jeans (recycling the hem once again), and then folded over the three edges without the hem and ironed them.  I pined them in place and top stitched around the edges. In the picture, the right pocket is finished and the left still needs to be stitched.

I think David manages to make up for any imperfections in the pants.


Friday, March 8, 2013

What I learned from Trading Spaces

Confession time: I used to watch Trading Spaces on TLC every day after school in Junior High.  I greatly believed the first host was much better than the second host, who now does RC Willey comercials. Neighbors have a few days, a carpenter, a designer, and $1000 to redo each other's rooms. I can't say I liked every room the show ever did (I don't remember all the designers names, but I remember I thought some did weird stuff), but I liked watching every room they ever did. It was fun to see how they re-purposed stuff.

I think it was around this time I kind of wanted to be an interior designer. I guess I am living out that dream on my own living room.
One of the things that appeared in almost every episode was making slipcovers.  They never went into much detail on this, but I remembered the footage of whatever piece of furniture with the slipcover fabric pined wrong-side out around the whole thing.

I decided to make a slipcover for the sofa we bought out of the same curtains I covered my bench in.  I decided on a slipcover probably for many of the same reasons they did so on trading spaces.  They are actually easier than reupholstering and they require less fabric. In my case, if I were to reupholster this sofa I would have to have enough fabric to cover the fold-out bed which is three times what you see as the seat cushions. I did make the decision to cover the body of the sofa separate from the cushions as one of the big downsides of slipcovers is that they can make furniture look like one big block.  The other downside is that they slip around a lot and bunch up.  I think I still have a bit of tweaking to do, but having separate pieces that are made specifically to fit each part does help this a well. 

In other words, they aren't so bad if they are custom made for your sofa, which really isn't that hard for the sofa I had. If your sofa has lots of curves and such it would be a lot harder, but this one had mostly straight lines.  I just draped fabric over the various parts and pinned the edges, removed the fabric and sewed.  One thing to note about this method is that the fabric I pinned over the left arm ended up on the right are when right side out (and vice versa), so if you are doing something asymmetrical, it will require a bit more work and planning. 

Because my sofa folds out, I decided to make the front panel that goes under the cushions detached from the sides.  It is held on by Velcro.  That way, I don't have to remove the whole slipcover to fold out the bed, buts the front panel and seat cushion covers.  Now to make some throw pillows (the one on the couch is just a pillow I already have with the pillow case from the sheet set folded around it).